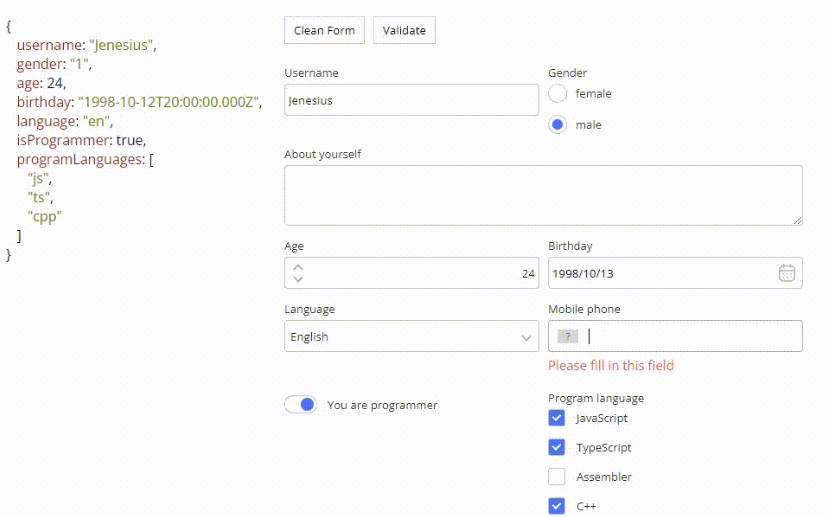
Advanced Vue 3 Form
This is a revised version of distraction-free-form example that was created back in July 2019.
This Typeform like form is built using:
- Vue 3 with:
- Render functions
- Functional components
- Single file components,
- Composables,
- Provide/Inject,
- Transitions
- Pinia,
- Vuelidate and
- Animate.css
What’s new
The ideas described in Building an Interactive and Distraction-free Form with Vue article still applies here in this Vue 3 example.
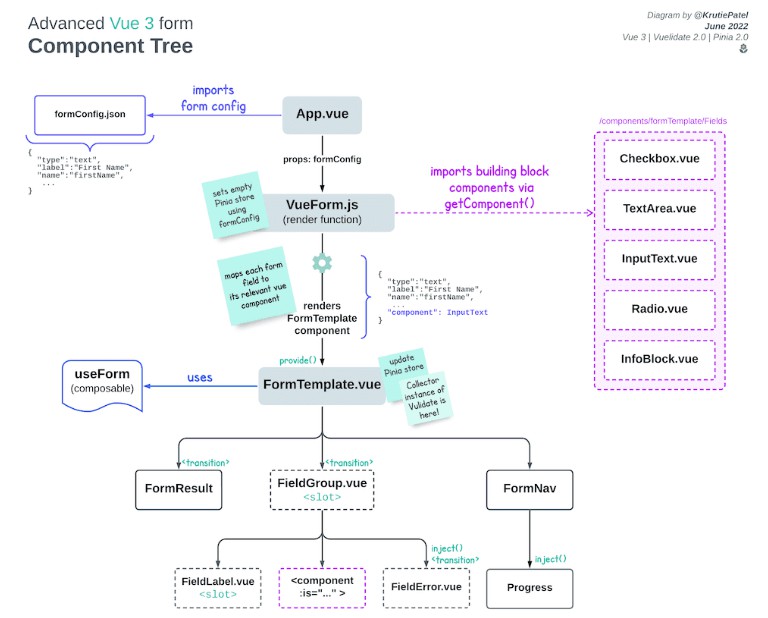
However, there are some technical differences that follow Vue 3 conventions. Diagrams seen in the article above have been updated as well.
Reference Links
Vue 2:
Vue 3:
See below to read more.
Full concept
Render functions in Vue 3
Function to create virtual node was available in render() function by default in Vue 2. This same function needs to be imported from vue 3 now. Here’s the signature of the new render function in Vue 3.
See how the render function is used in VueForm.js to load dynamic form-field components as per defined in form configuration.
Functional components in Vue 3
Everything we knew about functional component in Vue 2 is true for Vue 3 as well. However, there are some differences in how we write functional component in Vue 3.
- Functional component now has the same signature as
setup()function - Functional component doesn’t need to have
function:trueas we had to in options API.
Functional components are applicable for both transitions.
import { h, Transition } from "vue";

function MyComponent(props, { slots, emit, attrs }) {

    // return the render function
    return () => h(Transition, props, slots)
}
Previously, we rendered <Transition> component by adding it as a string, like: return h("transition", data, context.children).
In Vue 3, we need to import an actual Transition component from vue and then pass it into render function h().
From mixins to composables
Back in Vue 2 example, we used mixins to share the formState and formData. That same mixin is now converted into useForm composable, that provides formState, formData and other helper methods to navigate individual fields within the form.
See all four composables used in this example.
From Vuex to Pinia
Back in Vue 2 example, we used Vuex store to create empty store based on form configuration. In this Vue 3 example, we use Pinia to create empty store.
// src/components/VueForm.js

// Set empty store for form data
const store = useLeadStore();

props.formConfig.forEach((field) => {
switch (field.type) {
    case "checkbox":
    return (store.formData[field.name] = []);
    case "radio":
    return (store.formData[field.name] = "");
    case "information":
    break;
    default:
    return (store.formData[field.name] = "");
}
});
As soon as we load the form, we have this ? empty store created for us to store user entered values. The pinia store looks a lot simpler now as well.
Vuelidate and 3 composables
Vuelidate is used for form validation. There are two custom composables, useFormField and useValidation along with useVulidate composable that’s provided by Vuelidate – all three of these composables take care of individual field validation before we can move onto the next step in the form.
Provide Inject
Reactive provide/inject is used to make sure formState is available in child components that are not in the direct hierarchy.
// src/components/FormTemplate.vue

provide("vueform", {
  validateField,
  formState,
});
$attrs in Vue 3
Back in Vue 2, $attrs were applied to component by simply binding them with dynamic component using
v-bind="{ ...field.options.attrs }"
<!-- src/components/FormTemplate.vue -->
<Component
    v-model="formData[field.name]"
    :is="field.component"
    v-bind="{ ...field.options.attrs }"
/>
In Vue 3, $attrs are passed the same way, v-bind="{ ...field.options.attrs }", but then they are available using $attrs in template section of the Vue component.
<input :placeholder="$attrs['placeholder']" />
See working example in InputBox.vue
Todos: further improvement
- TypeScript
- CSS Refactoring (Windicss)
- XState
