Frappe UI
A set of components and utilities for rapid UI development.
Frappe UI components are built using Vue 3 and Tailwind. Along with components,
it also ships with directives and utilities that make UI development easier.
Installation
npm install frappe-ui
# or
yarn add frappe-ui
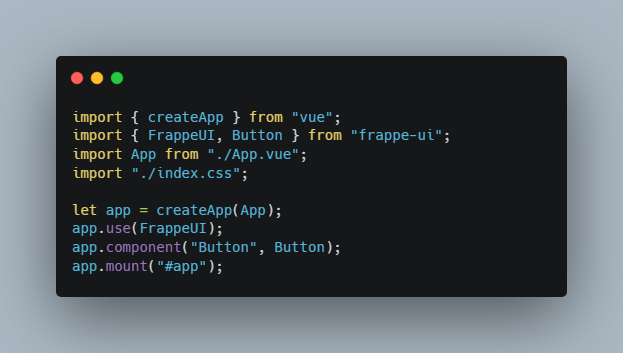
Now, import the FrappeUI plugin and components in your Vue app’s main.js:
import { createApp } from "vue";
import { FrappeUI, Button } from "frappe-ui";
import App from "./App.vue";
import "./index.css";

let app = createApp(App);
app.use(FrappeUI);
app.component("Button", Button);
app.mount("#app");
In your tailwind.config.js file, include the frappe-ui preset:
module.exports = {
  presets: [
    require('frappe-ui/src/utils/tailwind.config')
  ],
  ...
}
Components
Frappe UI ships with a bunch of components. To use a component, you can import it directly from frappe-ui:
<template>
    <Button>Click me</Button>
</template>
<script>
import { Button } from 'frappe-ui';
export default {
    components: {
        Button
    }
}
</script>
You can also register components on the root app so that you don’t have to import them in every component.
main.js
import { createApp } from "vue";
import { Button, Input } from "frappe-ui";

let app = createApp(App);
app.component("Button", Button);
app.component("Input", Input);
app.mount("#app");
Alert
<Alert title="Info">Your account has been created.</Alert>
Avatar
<Avatar label="John Doe" />
<Avatar label="John Doe" imageURL="https://picsum.photos/200" />
Badge
<Badge>Open</Badge>
<Badge color="green">Completed</Badge>
<Badge color="red">Error</Badge>
<Badge color="yellow">Closed</Badge>
<Badge color="blue">Running</Badge>
Button
<Button>Default</Button>
<Button type="primary">Primary</Button>
<Button type="danger">Danger</Button>
<Button type="white">White</Button>
<Button icon="x" />
<Button icon-left="menu">Menu</Button>
<Button icon-right="external-link">Link</Button>
<Button :loading="true">Loading</Button>
Card
<Card title="Heading" subtitle="Sub text">
    <div class="text-base">Card content</div>
</Card>
Dialog
The Dialog component uses teleport feature and requires #modals to exist.
Make sure you add a <div id="modals"></div> before the end of your body tag.
<Button @click="dialogOpen = true">Open Dialog</Button>
<Dialog title="This is Dialog" v-model="dialogOpen">
    <div class="text-base">Dialog content</div>
</Dialog>
Dropdown
The Dropdown component uses teleport feature and requires #popovers to exist.
Make sure you add a <div id="popovers"></div> before the end of your body tag.
<Dropdown :items="[{ label: 'Option 1' }, { label: 'Option 2' }]">
    <template v-slot="{ toggleDropdown }">
        <Button @click="toggleDropdown()">Open Dropdown</Button>
    </template>
</Dropdown>
ErrorMessage
<ErrorMessage message="There was an error" />
FeatherIcon
Uses feather-icons under the hood.
<FeatherIcon class="w-4 h-4" name="menu" />
<FeatherIcon class="w-4 h-4" name="circle" />
<FeatherIcon class="w-4 h-4" name="arrow-left" />
<FeatherIcon class="w-4 h-4" name="arrow-right" />
GreenCheckIcon
<GreenCheckIcon class="w-4 h-4" />
Input
<Input label="Text" type="text" value="" placeholder="Text" />
<Input label="Long Text" type="textarea" value="" placeholder="Textarea" />
<Input
    label="Select"
    type="select"
    value=""
    :options="['Option 1', 'Option 2']"
/>
<Input label="Check" type="checkbox" value="" />
ListItem
<ListItem title="List Item 1" subtitle="Sub text 1">
    <template #actions>
        <Button icon="more-horizontal" />
    </template>
</ListItem>
<ListItem title="List Item 2" subtitle="Sub text 2" />
LoadingIndicator
<LoadingIndicator />
LoadingText
<LoadingText />
Spinner
<Spinner class="w-5" />
SuccessMessage
<SuccessMessage message="Completed successfully" />
Directives
onOutsideClick
This directive is used when you want to execute a function when the user clicks outside of a target element. For e.g., when user clicks outside a dropdown, the dropdown should close.
<button v-on-outside-click="handleOutsideClick">Click me</button>
Utilities
call
This function wraps fetch API. It is built for making web requests to a Frappe server.
call('frappe.client.get_value', {
    doctype: 'ToDo',
    filters: {name: 'adsfasdf'},
    fieldname: 'description'
})
resources
This is a helper for managing async data fetching in Vue apps that work with a Frappe backend.
<template>
    <div>
        <LoadingText v-if="$resources.todos.loading" />
        <div
            v-for="todo in $resources.todos.data || []"
            :key="todo.name"
        >
            <div>{{ todo.description }}</div>
            <Badge>{{ todo.status }}</Badge>
        </div>
        <ErrorMessage message="$resources.todos.error" />
    </div>
</template>
<script>
import { Badge, LoadingText, ErrorMessage } from 'frappe-ui';

export default {
    name: 'ToDos',
    resources: {
        todos: {
            method: 'frappe.client.get_list',
            params: {
                doctype: 'ToDo',
                fields: ['*']
            }
        }
    },
    components: {
        Badge,
        LoadingText,
        ErrorMessage
    }
}
</script>
socketio
This module pre-configures a socketio instance on the port 9000. If you install the FrappeUI plugin, this.$socket will be available in all Vue components.
Usage:
this.$socket.on('list_update', (data) => {
    // handle list update event
});
tailwind.config
This is a tailwind preset that customizes the standard tailwind config to include Frappe design tokens.
Usage:
module.exports = {
  presets: [
    require('frappe-ui/src/utils/tailwind.config')
  ],
  ...
}
Vue Plugin
Vue plugin that installs call, resources and socketio in your Vue app
main.js
import { createApp } from "vue";
import { FrappeUI } from "frappe-ui";
import App from "./App.vue";

let app = createApp(App);
app.use(FrappeUI);
app.mount("#app");
You can now use these features in your Vue components.
<script>
export default {
    resources: {
        ping: 'frappe.handler.ping'
    },
    mounted() {
        this.$call('ping');
        this.$socket.on('list_update', (data) => {
            // handle list update event
        });
    }
}
</script>
License
MIT