Introduction
CloudSharePlus is an innovative online document-sharing platform that eliminates the hassle of remembering passwords and empowers seamless collaboration. In this blog, I will take you through the inspiration, product details, challenges faced, and the incredible journey of bringing CloudSharePlus to life.
Inspiration
The integration of passwordless login with Supabase has served as a source of inspiration for me, it motivated me to explore the possibilities of integrating a similar solution with Appwrite as it provides a wide range of functionality, including user authentication, database administration, and file storage. Integrating Backend as service applications like these with Passage would enhance user experience and mitigates password-related risks. I came up with the idea to create a passwordless document-sharing platform that would enhance productivity and ease of use and cover most of the basic scenarios related to any Backend as service applications.
Team Members
I am proud to announce that I have completed the project entirely on my own.
CloudSharePlus Details
CloudSharePlus is a user-friendly online file sharing platform that leverages advanced authentication technologies to provide a seamless user experience. Here’s a breakdown of the product
Authentication
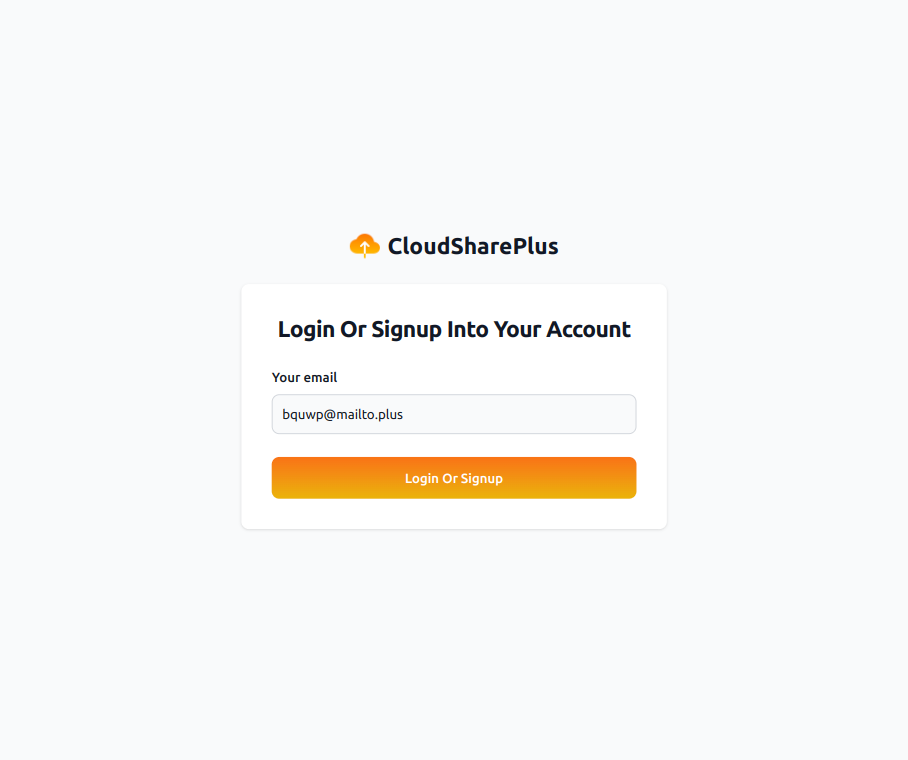
Authentication is the simplest part of the application, CloudSharePlus doesn’t have two different routes for registering or login, it has a single page using which a user can login, the only ask is an email address. If the browser and the device supports then users can login using the biometrics incase it is not supported a magic link is sent to the email address on click of which the user is logged in.
Dashboard
The dashboard comprises of 4 subsections, each one has been described below
-
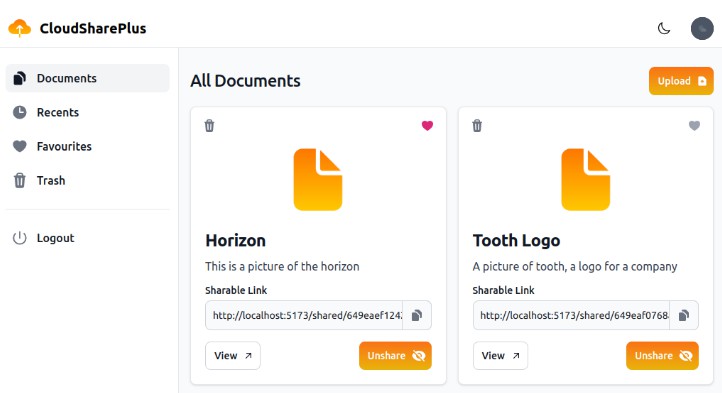
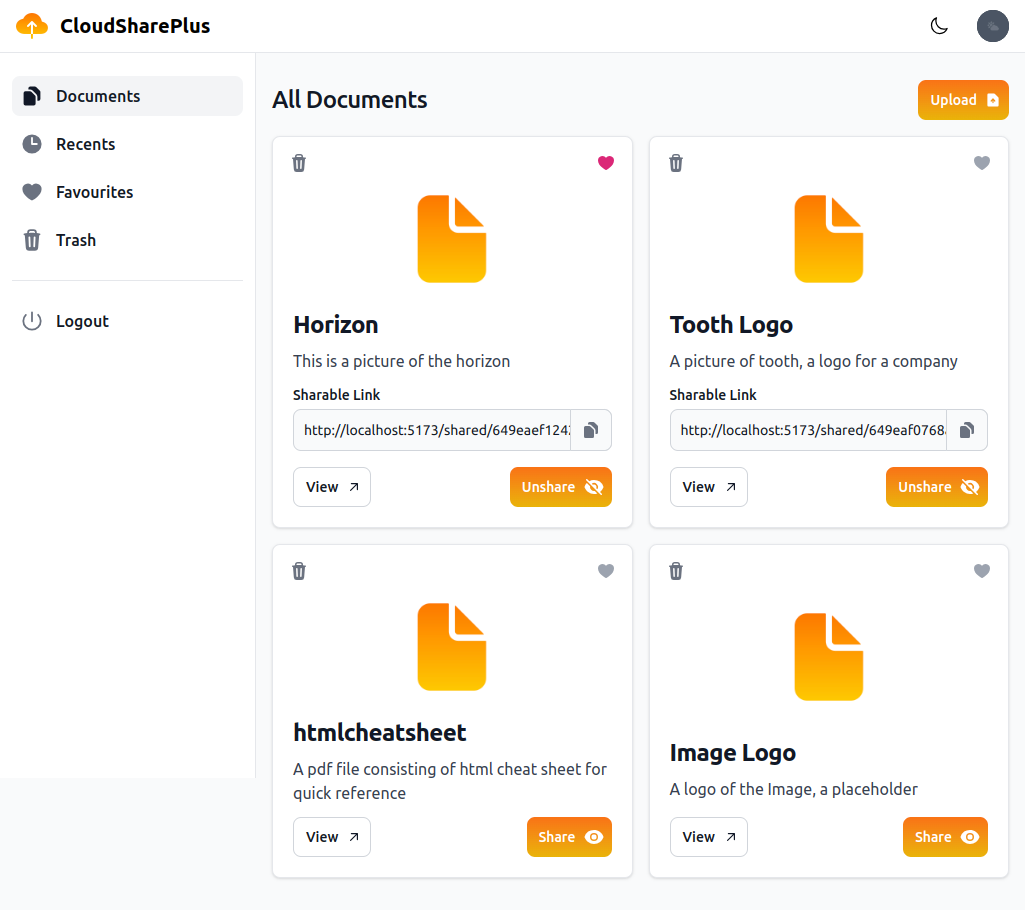
Documents
This section consists of all the documents uploaded by the user, each document is shown as a card which has multiple buttons for multiple operations.
-
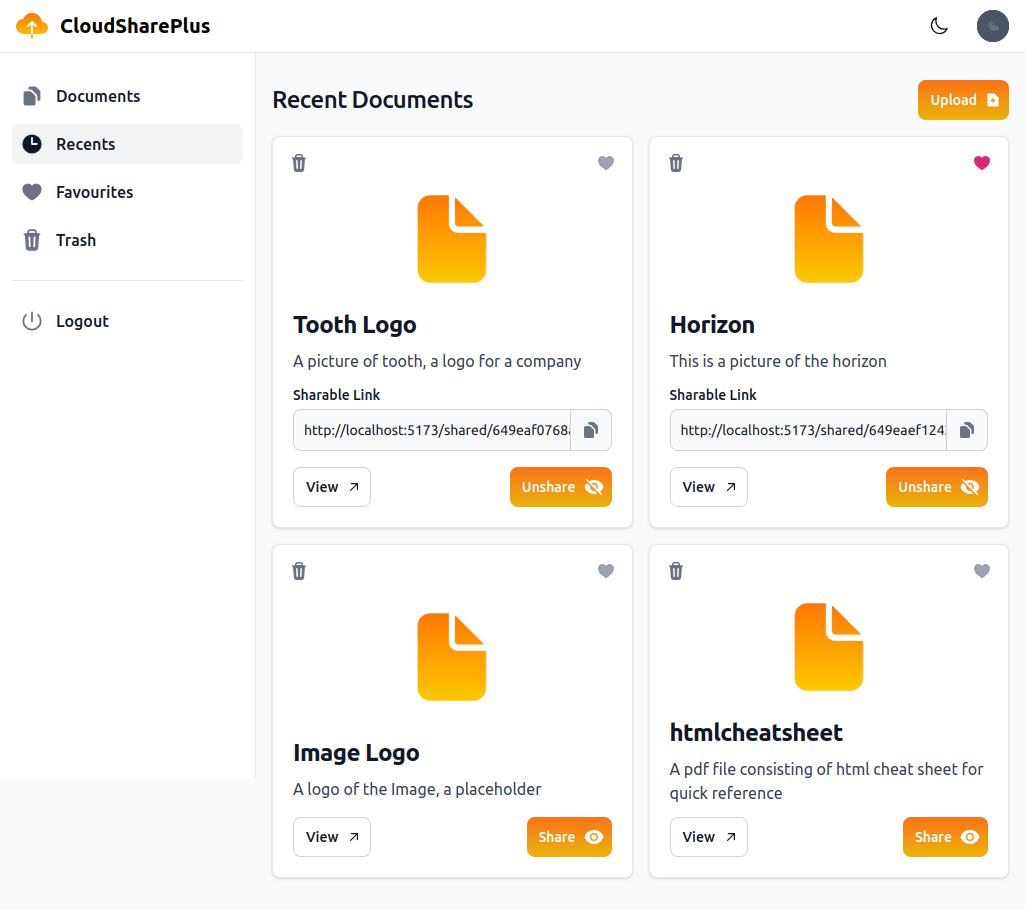
Recents Recent lists all of the user’s documents in descending order of their last modified dates, i.e if a user modifies any documents i.e make it favourite or shares it or vice versa then that will appear on top of the list in recents.
-
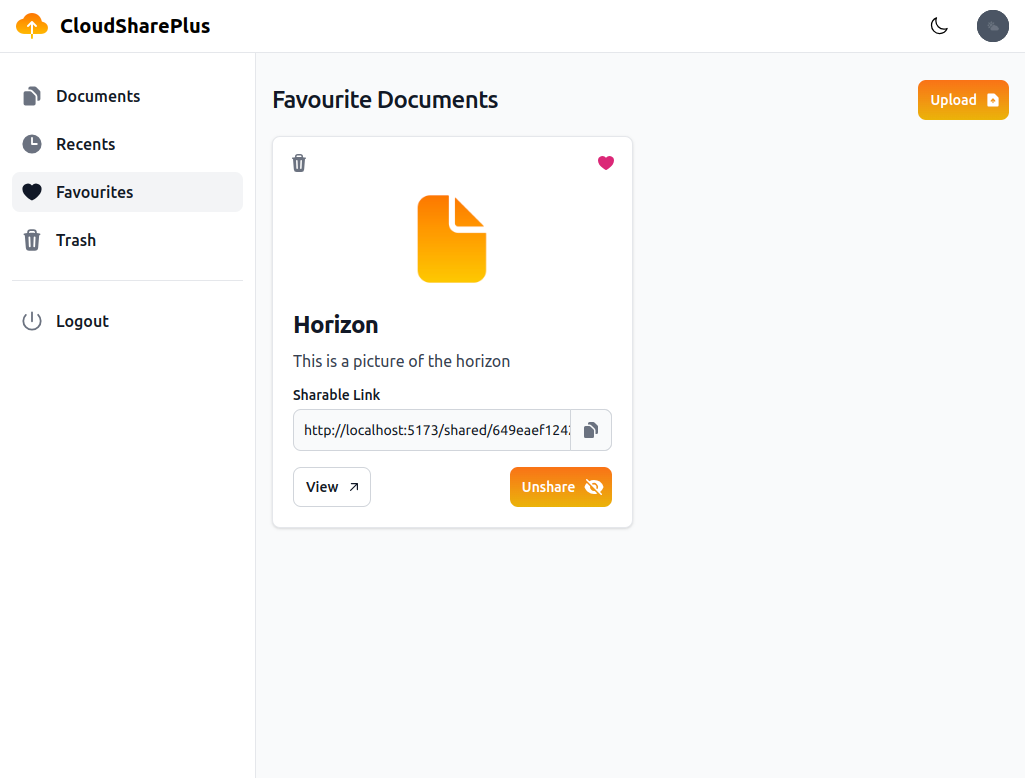
Favourites it lists all the documents which are marked favourite by the user by clicking on the hear button on the top right corner of the card.
-
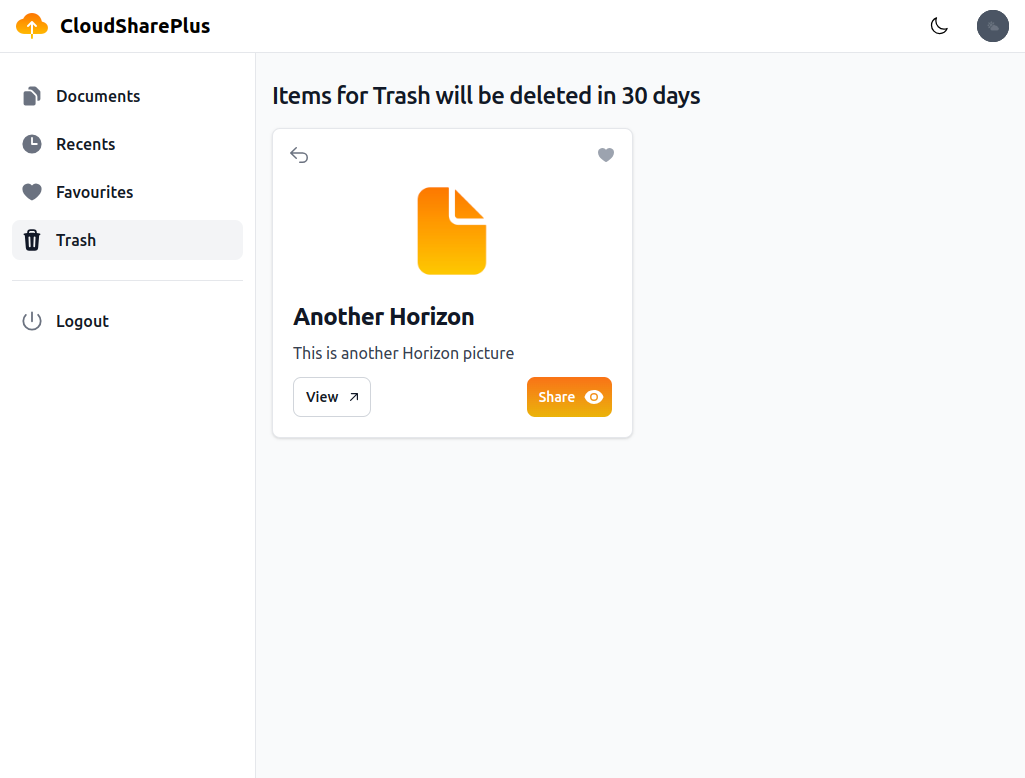
Trash Documents which are deleted by the user by clicking on the trash button on the top left corner of the card appear here, notice that in this section a restore button appears instead of the trash button on the top left corner of the card, clicking on this will restore the document. Deleted documents are not sharable
Upload View
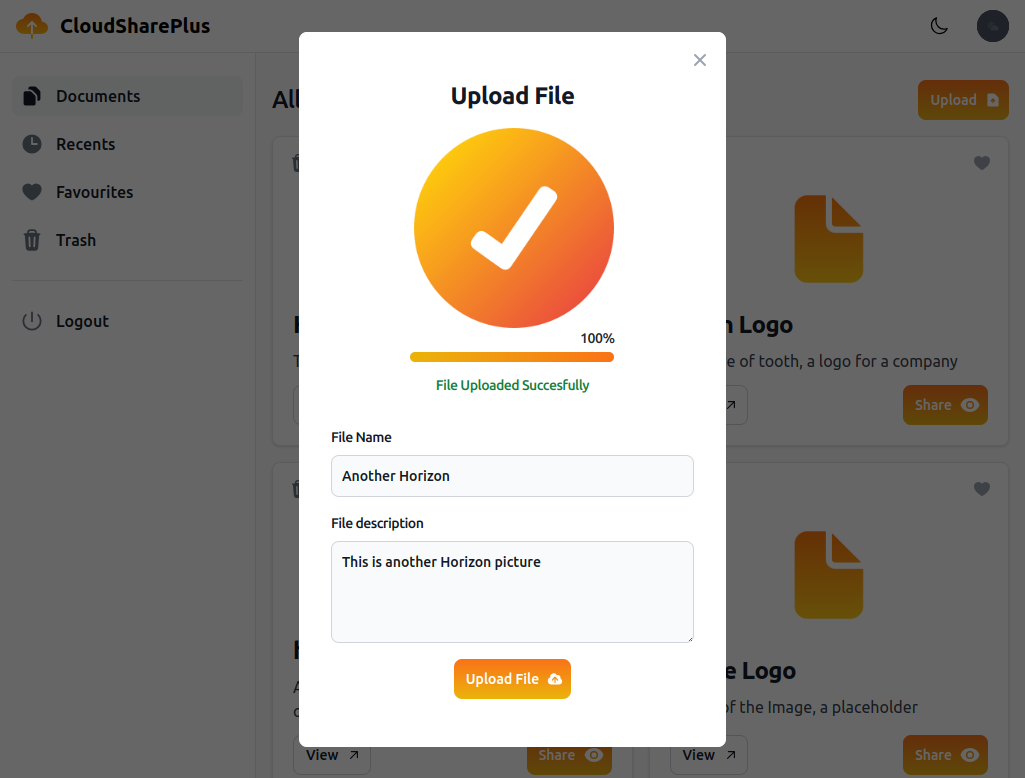
Users can upload documents by clicking on the upload button on the right corner of the dashboard. On clicking a pop-up appears which has 2 fields, after uploading a file by clicking on the cloud button user can enter a custom name of the file and a description and hit upload to upload the file.
View Pop
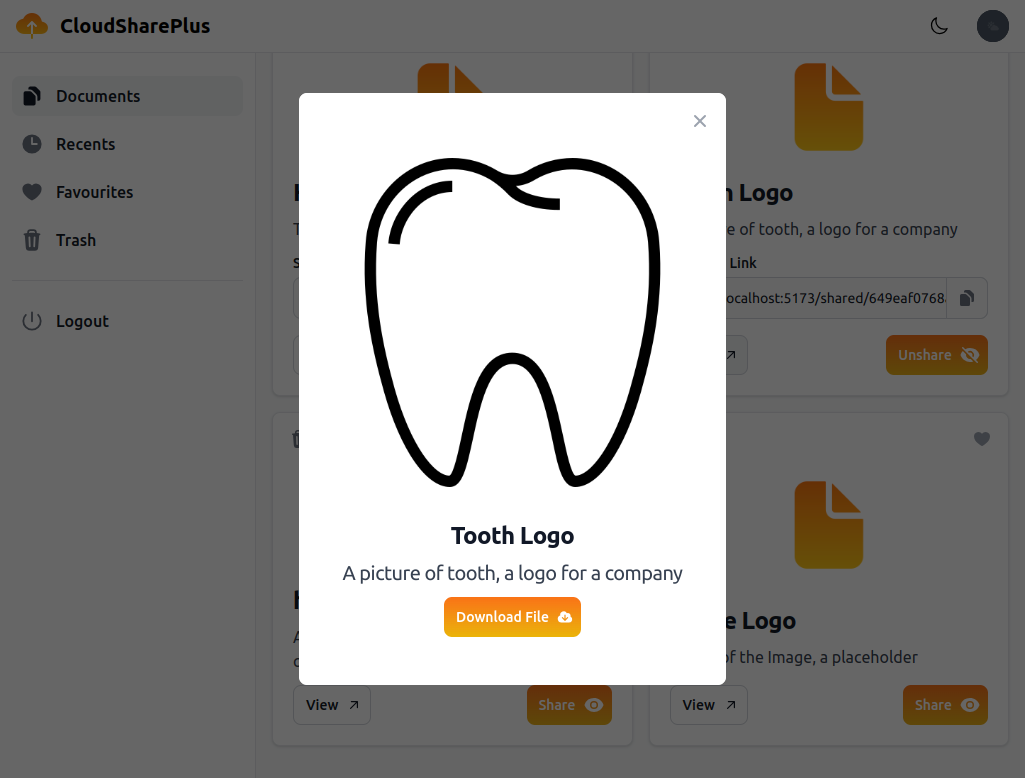
Users can check each file by clicking on the view button on the card, it opens a popup showing the document name and description and a download button, clicking on the download will download the file.
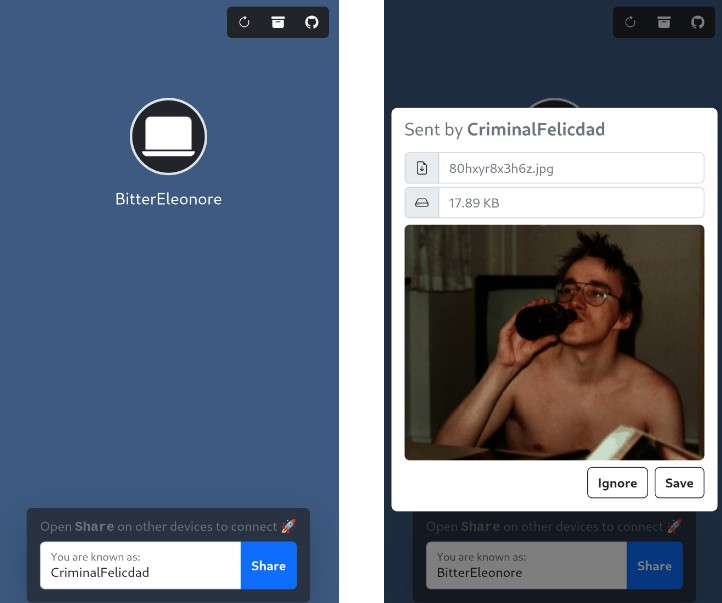
Share File View
Users can share files with anyone using the global link, for that, the user needs to click on the share button on the card, and post that the shareable link is visible to the user which can be copied and shared across. A person having the link need not be a CloudSharePlus user, following is the view of how a shared file would appear when someone tris to access using the link.

CloudSharePlus Architecture
Following is the high-level architecture diagram of the application. Login is done on the client side by directly making a request to the passage server which returns a token which is sent with every request in the headers, this token is used by the backend to check if the user is authenticated or not if not the server throws 401 else the API logic is executed and a final response sent back to the client.
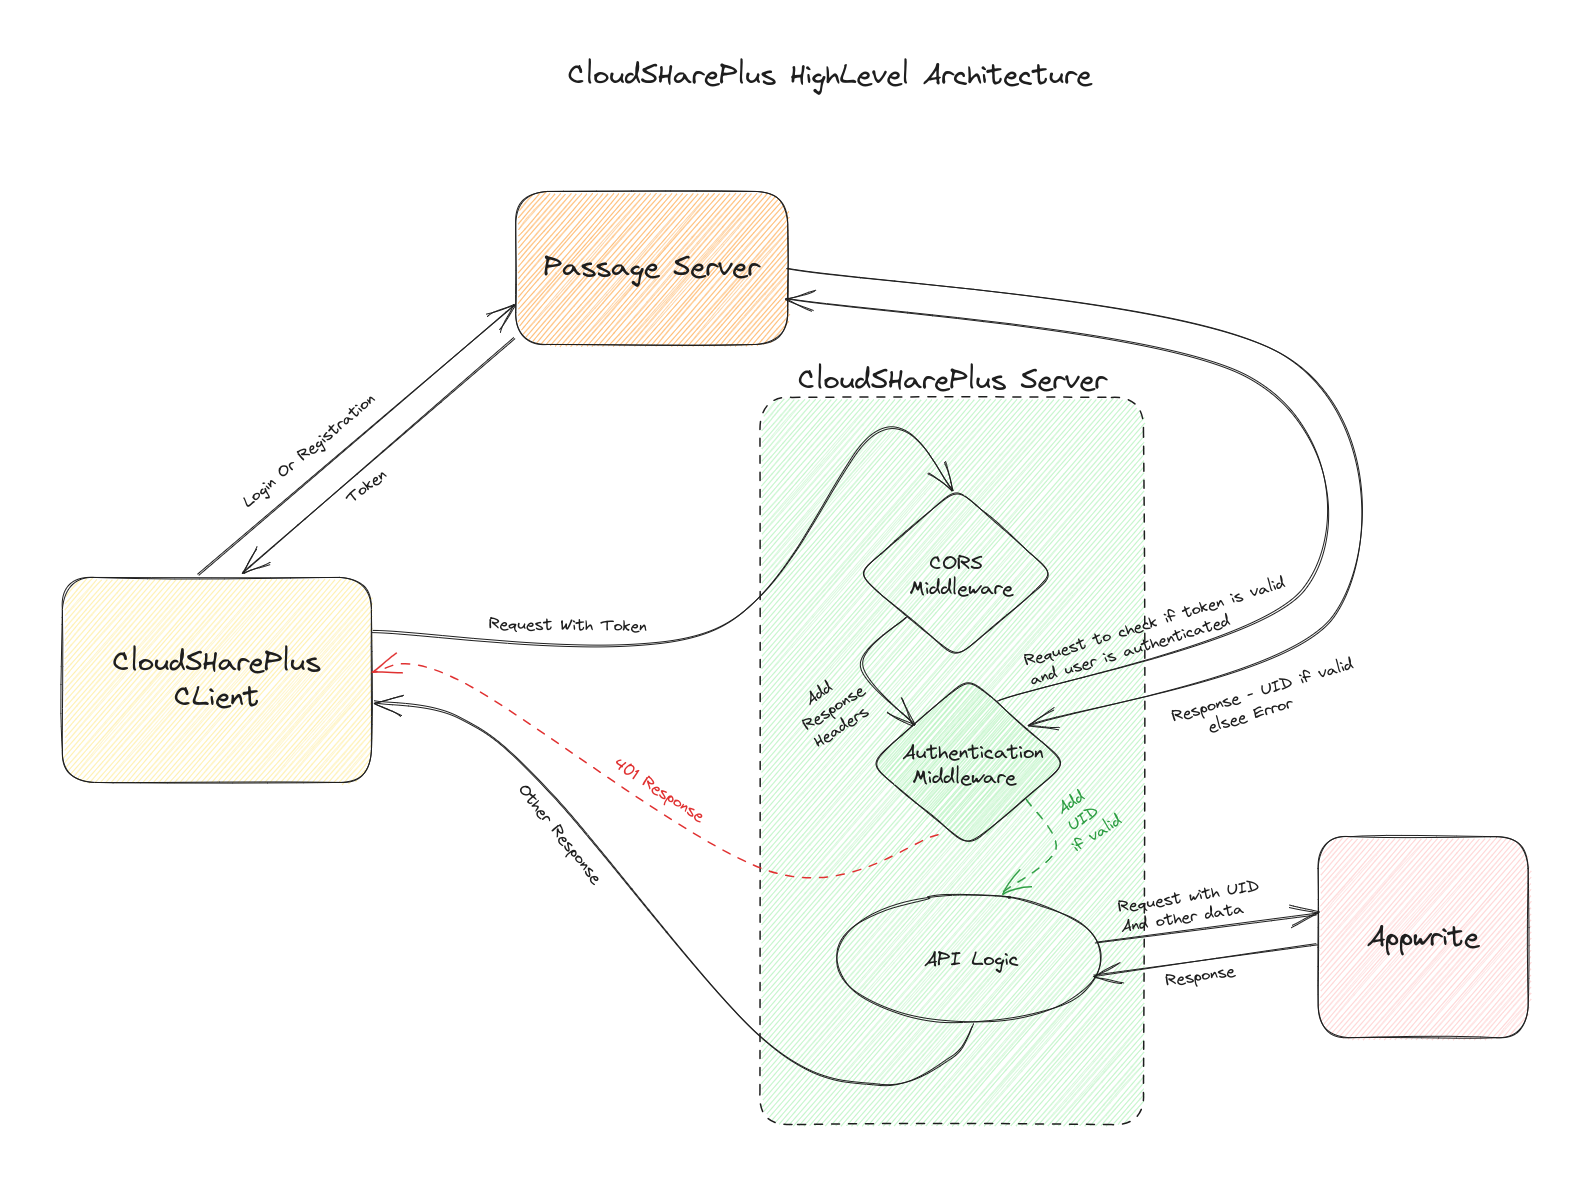
Could we have not avoided the backend by simply making requests to Appwrite from client? The answer is no, Appwrite doesn’t provide a custom RLS(Row Level Security) rule from any database or collection, so in order to execute any operations like file upload and database entries we would have to make the database open and accessible to all which is a disaster. Hence backend is important as we can generate a key for our server and using that key server can perform operations on Appwrite, a very naive RLS is achieved by querying based on UID and the problem of public accessibility is also solved as the authentication middleware will only allow authenticated users to perform any operations.
Tech Stack
The development of CloudSharePlus required careful selection of a robust tech stack to ensure optimal performance, security, and scalability. Here’s an overview of the technologies and frameworks used in building the platform.
-
VueJs for Frontend
-
Tailwind for Styling
-
Express for Backend
-
Passage by 1Password for Passwordless Authentication (User Management)
-
Appwrite for Database and Storage
-
Vercel for Backend Deployment
-
CloudflarePages for Frontend Deployment
Passage’s Usage
Instead of going with passage elements, I went ahead with integration with passage.js for login or signup.
Consider the following UI

On click of the login button login function is called it checks if the user exists or not based on this result the decision is taken whether to register the user or login, and then it checks if the passage project is configured for webauthn and id webauthn is supported if so then login/registration using webauthn is initiated else login/register using the magic link is triggered.
import { Passage } from '@passageidentity/passage-js'

const passage = new Passage(import.meta.env.VITE_PASSAGE_KEY)

async login() {
       // variable check git repo for more details
      this.loginTriggered = true
      const app = await passage.appInfo()
      const webAuthConfig = passage.checkWebauthnConfig(app)
      const isWebauthnSupported = await passage.isWebauthnSupported()
      const userInfo = await passage.identifierExists(this.email)
      let response
      if (userInfo === null) {
        //register
        if (webAuthConfig && isWebauthnSupported) {
           // getResponseInDesiredFormat is just to handle errors
           // check the last code block for details
          response = await this.getResponseInDesiredFormat(() => {
            passage.register(this.email)
          })
        } else {
          response = await this.getResponseInDesiredFormat(() => {
            passage.newRegisterMagicLink(this.email)
          })
        }
      } else {
        //login
        if (webAuthConfig && isWebauthnSupported) {
          response = await this.getResponseInDesiredFormat(() => {
            passage.login(this.email)
          })
        } else {
          response = await this.getResponseInDesiredFormat(() => {
            passage.newLoginMagicLink(this.email)
          })
        }
      }
      if (response.success) {
        // variable check git repo for more details
        this.showSuccessText = true
        if (webAuthConfig && isWebauthnSupported) {
           // variable check git repo for more details
          this.successfulText = 'Complete the login using biometrics'
        } else {
           // variable check git repo for more details
          this.successfulText = "We've sent you a maigc link ,please check your email"
        }
        // function to save email in local storage
        this.saveEmail()
      } else {
        // variable check git repo for more details
        this.showError = true
        // variable check git repo for more details
        this.errorText = response.data.message
      }
        // variable check git repo for more details
      this.loginTriggered = false
    }
In the case of the magic link, after clicking on it user is redirected to the same page but this time input and login button is disabled and on page load immediately authenticateMagicLink function is called. authenticateMagicLink authenticates the magic link received using webauthn or plain magic link activation based on the parameters same stated above.(webAuthConfig and isWebauthnSupported)
    async authenticateMagicLink() {
      // variable check git repo for more details
      this.validatingMagicLnk = true
      const app = await passage.appInfo()
      const webAuthConfig = passage.checkWebauthnConfig(app)
      const isWebauthnSupported = await passage.isWebauthnSupported()
      let response
      if (webAuthConfig && isWebauthnSupported) {
        response = await this.getResponseInDesiredFormat(() =>
          passage.magicLinkActivateWebAuthnNewDevice(this.mlCode)
        )
      } else {
        response = await this.getResponseInDesiredFormat(() =>
          passage.magicLinkActivate(this.mlCode)
        )
      }
      if (response.success) {
        // variable check git repo for more details
        this.showSuccessText = true
        // variable check git repo for more details
        this.successfulText = 'Validation Complete'
        // redirecting to dashboard
        this.$router.push('/dashboard')
      } else {
        // variable check git repo for more details
        this.showError = true
        // variable check git repo for more details
        this.errorText = response.data.message
        // removing querry params to avoid any magic link path issues
        this.$router.replace({ query: null })
      }
      // variable check git repo for more details
      this.validatingMagicLnk = false
    }
getResponseInDesiredFormat is a helper fucntion to catch any errors and return response in a stnadard format.
    async getResponseInDesiredFormat(fn) {
      let response
      try {
        response = await fn()
        response = {
          data: response,
          success: true
        }
      } catch (error) {
        response = {
          data: error,
          success: false
        }
      }
      return response
    }
Check this file for detailed code.
Appwrite’sUsage
Database and Storage were the services which I used from Appwrite.
Database
Used a single collection to store all the file-related details, but had to create multiple indexes. following is the schema of the table.
Collection – file_details
-
uid – String – passage user id
-
fid – String – bucket file id
-
file_name – String – custom name of the file given by user
-
is_deleted – Boolean – to toggle delete status
-
fav – Boolean – to toggle favourite status
-
is_shared – Boolean – to toggle share status
-
extension – String – extension of the file
-
description – String – custom description of the file
Only the Backend has the API Key with the permission to edit, read and create documents in the collection.
Storage
Used a single storage bucket for storing all the different files, on successful upload the file id is returned to the client via the backend which is used to make the entry in the file_details collection.
Again in this case too only the Backend has the API Key with the permission to create documents in the collection.
Challenges Faced
There were several difficulties encountered throughout the development of CloudSharePlus, some of which are detailed here.
-
The most challenging aspect of creating CloudSharePlus turned out to be the application’s architectural design. had to think of a way of balancing the user-friendly interface, seamless authentication, and secure file storage. I was initially thinking of not involving any backend and doing everything on the client but then realized soon that it would be impossible to do it just on the client end, a backend server was necessary, finally, I was able to come up with a solution which has been mentioned in the architecture section.
-
Appwrites Cloud instance was quite slow and was not able to execute more than 3 queries even after indexing. I was left with 2 choices either go for sorting on the backend or filtering based on a boolean and since sorting is more costly I went ahead with a custom filtering on the backend. I don’t exactly know about the problem but I strongly feel if I spin up a dedicated instance on cloud it might work as it was working locally, I didn’t get the time to test the same but would test this out in a few days.
CloudSharePlus Code Repository
Here is the link to CloudSharePlus’s code repository, feel free to raise issues and contribute. https://github.com/BaroiSubhraJyoti/CloudSharePlus
CloudSharePlus Link
Here is the link to CloudSharePlus
Site :- https://cloudshareplus.pages.dev
Email :- [email protected] Name :- kuodnyg To access the magic links navigate to this site and type the “Name” in the input box( watch the demo if it is unclear). If It doesn’t work then then you can login/register using any other email and start afresh.
CloudSharePlus Demo
Here is the link to the demo of CloudSharePlus https://youtu.be/YQq9TJ-OmJ8
Conclusion
The journey of building CloudSharePlus has been an incredible learning experience. I am happy as I was able to integrate Passage with Appwrite, with a sense of pride in my accomplishments, I am excited to present CloudSharePlus as my Hackathon submission.
I would love to get input from the community and would ask everyone to give it a go and raise your issues here.
I am grateful to Hashnode and 1Password for this opportunity to present my creation and share it with the world.