Aura Admin

Version: 3.1.1
Show some ❤️ and ⭐ the repo to support the project
If you are using Aura, Kindly fill this form for Aura Web App Directory
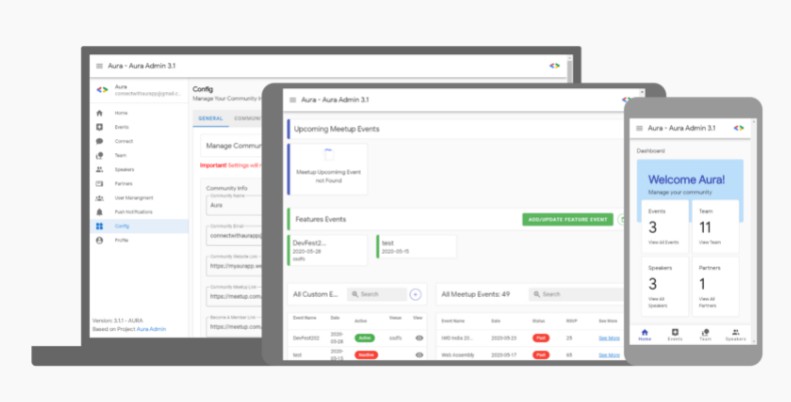
Overview
Aura Admin is the Web App that helps you to mange the Tech Communities like GDGs, DSCs or any other tech communities.
The template is created by GDG Jalandhar team experience of running meetups/events.
Features
| Feature | Description |
|---|---|
| Fast and optimized | PWA on Lighthouse |
| Works offline | Can work offline |
| Mobile first | Mobo Friendly Web app can be installed as a native app on your phone |
| SEO optimized | index all content and get to the top in search results |
| Easy in management | Store all the data in Cloud Firestore |
| Trigger Push Notification | Trigger Push Notification to Aura Main |
| User Management | Role based Authentication for the Team |
| Connect | Team Member can communicate in Group |
| Usability | Any Tech Communities can use |
Getting Started
- Fork this repository & Aura Main (Important) and clone both repo locally
- Setup Environment
- Install Node.js (v8.9.4 or above)
- Install vue cli:
npm install -g @vue/cli
- Install project dependencies:
npm install - If you already have setup Aura Main then use same Firebase Project
- Otherwise Create Firebase account and Create a new Project
- Go to Firebase Project Dashboard
- Go to Cloud Firestore Database and Enable the database in test mode
- Once the database is created, Click on Rules navigation pill and add the following lines in the rules edit
    rules_version = '2';
    service cloud.firestore {
        match /databases/{database}/documents {
            match /apiEnd/{apiEndpoint}{
                allow read, create : if true;
              allow delete : if request.auth.uid != null;
              allow update : if request.auth.uid != null;
              allow list: if request.auth.uid != null;
            }
            match /{document=**} {
              allow read : if true;
              allow delete : if request.auth.uid != null && get(/databases/$(database)/documents/users/$(request.auth.uid)).data.userType == "Super Admin";
              allow create : if request.auth.uid != null;
              allow update : if request.auth.uid != null;
            }
        }
    }
- Go to Firebase Storage
- Copy the code which looks similar to the below sample and update the rule for Firebase Storage
service firebase.storage {
  match /b/{bucket}/o {
    match /{allPaths=**} {
      allow read, write: if request.auth != null;
    }
  }
}
- In the Firebase project console dashboard. Click on create a new app
- Go to Firebase project Settings and then General Settings Tab
- Scroll down and go to your app section under Firebase SDK snippet
- Click on node/config radio select
- Copy the code which looks similar to the below sample
apiKey: "Axxxxxxxxxxxxxxxxxxx",
authDomain: "xxxxxx.firebaseapp.com",
databaseURL: "https://xxxxxxxx.firebaseio.com",
projectId: "xxxxxxxxx",
storageBucket: "xxxxxxx.appspot.com",
messagingSenderId: "xxxxxxxxxxx",
appId: "1:xxxxxxxxx:web:xxxxxxx"
- Now goto project code on your local system and inside
src/config/firebase-config.jsupdate thefirebase-config.jsfile with the code you copied from the Firebase console and Update the fieldnamein vue.config in the local project root directory - Click on Authentication in the left navigation.
- Click on Sign-in method and enable Email/Password
- Create user with Email and Password
- For Cloud Functions
npm installfor installing dependencies- Go to functions folder and then in the terminal run this command
firebase functions:config:set someservice.email="[email protected]" someservice.password="yourpassword"
- Run locally
npm run serve - When you are ready to build for production, use the following command –
npm run build- A directory named dist will be created
- For testing:
npm run test
Push Notification Setup
- Go to Firebase Project Dashboard
- Go to Firebase Projects Settings then navigate to Cloud Messaging
- Copy the
server key - Go to your Aura Admin Dashboard and paste at the server key at
Config -> Keys & SecuritiesasCloud Messaging Server Key - Again, in the Firebase Project Dashboard, go to
Projects Settings -> Cloud Messagingand scroll down to theWeb configuration sectionand click onGenerate Key pair - Copy the generated key and Paste it at Aura Admin Dashboard’s
Config -> Keys & SecuritiesasCloud Messaging Web Push certificate - Save the Config by clicking on Save
Keys and Security - For Sending Push Notification from Aura Admin Dashboard
- Go to Notification
- Click on Add Notification
- Fill fields as required
- Click on Send Push Notification Button in Table
Deployment on Firebase
- Install required tools for performing Firebase deployment
- Install Firebase CLI:
npm i -g firebase-tools
- Install Firebase CLI:
- Login into Firebase CLI using the following command –
firebase login - Open Terminal/CMD/Powershell in the root directory of your clone of aura-admin repository.
- Now type
firebase logincommand in your Terminal/CMD/Powershell - Update the
Firebase Project IDin.firebasesrcfile. This value should match the project ID in your Project Settings of the Firebase project you created in the previous section. - Go to the Firebase Console Dashboard and Click on Hosting in the left navigation.
- Click on Get Started
- Click through all steps till you’re taken to the Hosting page in the console.
- You’ll be provided with a ready domain with your project ID. It should look like –
<project-id>.web.app or <project-id>.firebaseapp.com - Copy the sub-domain name of the URL provided. In this case, it will be the project ID. However, to be precise, you have to copy the part before .web.aap or .firebaseapp.com. This is your Site ID
- Update
Firebase.jsonfile, set the site key to Site ID{ "hosting": { "site":"Your_Firebase_Hosting_id", "public": "dist", "rewrites": [ { "source": "**", "destination": "/index.html" } ], "ignore": [ "firebase.json", "**/.*", "**/node_modules/**" ] } }
- In your terminal at the root directory of the project, build and deploy using the following command
firebase deploy
- Google LessSecure App open this link and enable Less secure app access
Also Allow access to your Google account from this url - If the project is successfully deployed, you should be able to visit your domain as found, and see the Aura Admin Dashboard. In future, we’ll refer to this website as your Aura Admin Dashboard.
Documentation
Technology Stack
Contributing
Awesome! Contributions of all kinds are greatly appreciated. To help smoothen the process we have a few non-exhaustive guidelines to follow which should get you going in no time.
Using GitHub Issues
- Feel free to use GitHub issues for questions, bug reports, and feature requests
- Use the search feature to check for an existing issue
- Include as much information as possible and provide any relevant resources (Eg. screenshots)
- For bug reports ensure you have a reproducible test case
- A pull request with a breaking test would be super preferable here but isn’t required
Submitting a Pull Request
- Squash commits
- Lint your code with eslint (config provided)
- Include relevant test updates/additions
- Pull requests must be made against
developbranch. Any other branch (unless specified by the maintainers) will get rejected.
Contributors
Maintainer: Vrijraj Singh
Developers: Vrijraj Singh & Bharat Agarwal
View Website Built with Projects
| Community Name | Web App Link |
|---|---|
| GDG Jalandhar | View Now |
| DSC NSEC | View Now |
| DSC VJIT | View Now |
Facing Any Problem or need any Help?
Write us in issues section. Our team will try solve your issue within 10-12 hours.
Project is published under the MIT license.
Feel free to clone and modify repo as you want, but don’t forget to add reference to authors ?