yumi.to
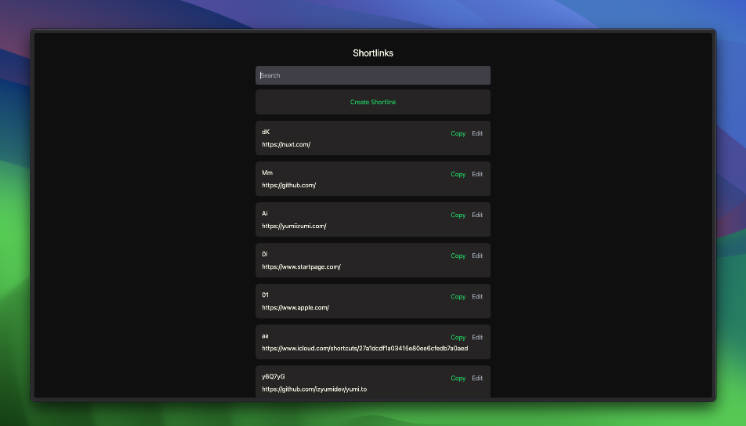
Your personal URL shortener built with Nuxt, Supabase, Vercel, and TailwindCSS.

Installation
Requirements
There is no requirement to use this project, but the following are recommended:
- Domain name (e.g.
yumi.to)
Creating Supabase project
- Create a new Supabase project
- Add a new table called
shortlinkswith the following columns:id(type:uuid, primary key)created_at(type:timestamp, default:now())short(type:text, unique)link(type:text)
or you can use the following SQL query:
create table public.shortlinks (
  id uuid not null default gen_random_uuid (),
  created_at timestamp with time zone not null default now(),
  short text not null default ''::text,
  link text not null default ''::text,
  constraint shortlinks_pkey primary key (id),
  constraint shortlinks_short_key unique (short)
)
Deploying
- Fork this repository
- Create a new Vercel project
- Add the following environment variables:
SUPABASE_URL(your Supabase URL e.g.https://<your-project>.supabase.co)SUPABASE_KEY(your Supabase public anon key)BASE_URL(your domain name e.g.https://yumi.to)
- Follow the instructions here to set up your custom domain.
Authentication with GitHub
By default, this project uses GitHub as the authentication provider. You can change this by editing pages/dashboard.vue and Supabase authentication provider settings.
To continue with GitHub, follow the instructions here
Row-level security for Supabase
After setting up authentication, you can add row-level security to your Supabase table to prevent unauthorized users from modifying your shortlinks.
- Create an account for yourself in the dashboard of your fork of this project (e.g.
https://yumi.to/dashboard) - Copy your user ID from the
userstable in Supabase - Add the following row-level security policies to your
shortlinkstable (replace<your-user-id>with your user ID from step 2):
-- Allow anyone to read shortlinks
create policy "Allow anyone to read shortlinks" on public.shortlinks for select using (true);

-- Allow yourself to create shortlinks
create policy "Allow yourself to create shortlinks" on public.shortlinks for insert with check (auth.uid() = '<your-user-id>');

-- Allow yourself to update shortlinks
create policy "Allow yourself to update shortlinks" on public.shortlinks for update using (auth.uid() = '<your-user-id>') with check (auth.uid() = '<your-user-id>');

-- Allow yourself to delete shortlinks
create policy "Allow yourself to delete shortlinks" on public.shortlinks for delete using (auth.uid() = '<your-user-id>');
- Go into Auth Settings in Project Settings on Supabase dashboard to disable new user signups.
Customizing
- Change
urlincomposables/useExternalRedirect.tsto whatever you want default redirect to be (e.g.https://yumiizumi.com) - Change
redirectTooption inpages/dashboard.vueto<your-domain>/dashboard(e.g.https://yumi.to/dashboard) - This project uses TailwindCSS for styling, so you can customize the styles by editing the component classes
Using with iOS Shortcuts
You can use this project with iOS Shortcuts to create a custom URL shortener. To do this, you can use the following shortcut:
- Create an API key
- Create a random string as the API key
- Take the MD5 hash of the API key
- Store the MD5 hash of the API key as
API_KEY_HASHin your Supabase Edge Function Secrets Management settings
- Get the shortcut here
- First time you run the shortcut, you will be prompted to enter your domain name (e.g.
yumi.to) and the API key you created in step 1 - You are now ready to use the shortcut!
License
This project is licensed under the MIT License – see the LICENSE file for details.
Acknowledgements
- Supabase
- Vercel
- Nuxt
- TailwindCSS
- Create a Scalable URL Shortener App Using Nuxt 3, Supabase, and TainwilndCSS


