vindigo
This project is currently in early development and is currently not useable in any way, shape or form. Do not use in production!
Once the project is in a more stable shape, contribution guidelines will be published as well. Stay tuned!
Introducion
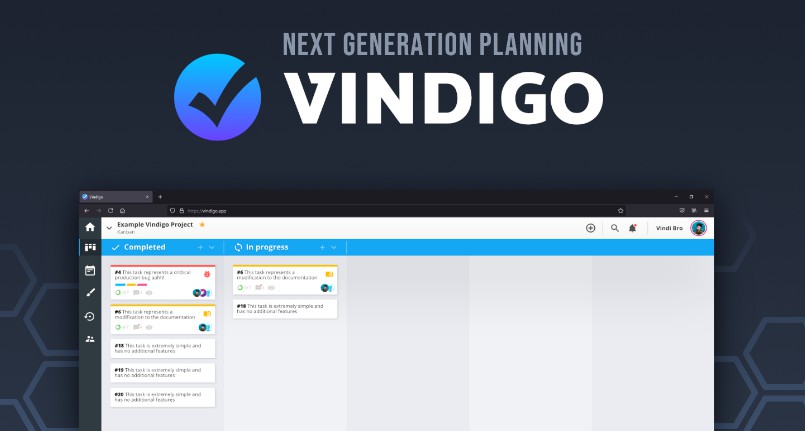
Vindigo is a next generation planning tool focused on productivity and usability for your team.
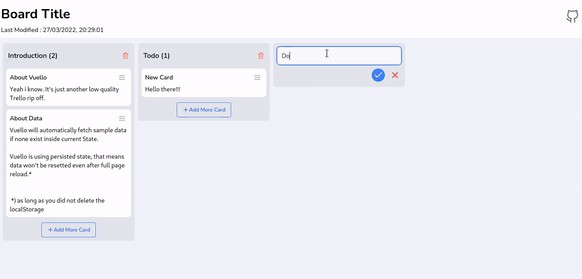
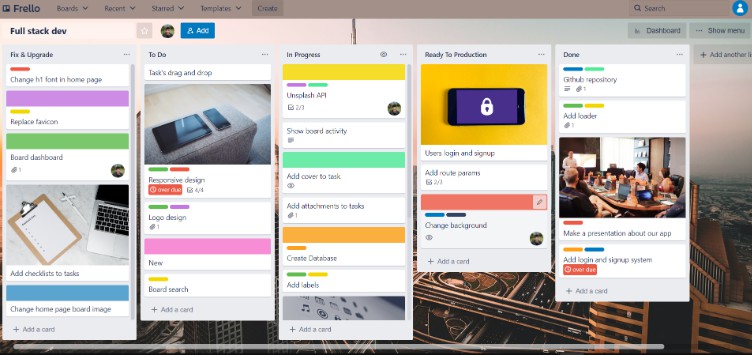
At its core, Vindigo offers an efficient way of creating, listing, and viewing your projects tasks. Inspired by other great planning tools, vindigo provides you with plenty of customization and extensibility, allowing it to fit your specific needs.
Features
- Implements an easy to use task hierarchy (Boards - Lists - Tasks)
- Instant live syncing across multiple browsers
- User and account management on a per-board basis
- Self hosted for full control over your data and setup
- Support for theming and customized themes
- Extensible with plugins and an easy to use API
- Fully open source and licensed under MIT
Docker installation
You can find the production ready vindigo image on Docker Hub. Visit the docker hub page for instructions on how to run Vindigo using docker directly or using docker-compose.
Manual installation
Prerequisites
Vindigo is built using node which means you will need to install NodeJS version 12 or higher. Make sure you also also have npm, the package manager for node (it usually comes bundled directly with node).
Setup
First, obtain a copy of Vindigo by cloning it from this repo
git clone https://github.com/ExodiusStudios/vindigo.git
Once you have obtained a local copy from github, run the following command to prepare your instance.
npm install -g yarn # Install the yarn package manager
You can now use the CLI to further proceed with the installation of Vindigo.
Windows (Command Prompt)
.\vindigo init
Unix based systems (Bash)
chmod +x ./vindigo  # Grant execution permission to the CLI
./vindigo init
Using the CLI (Command-line Interface)
The CLI provides many useful commands allowing you to manage your Vindigo setup. In order to launch Vindigo, run the following command.
./vindigo start
Vindigo will be started in the background and can now be accessed on http://localhost:8085.
The CLI provides many more commands used to manage your Vindigo setup. The following snippet is directly generated from ./vindigo help.
./vindigo <cmd> [options]

Commands:
  vindigo start                Launch the Vindigo server
  vindigo stop                 Terminate the Vindigo server
  vindigo restart              Restart the Vindigo server
  vindigo status               Show the current daemon status
  vindigo run                  Start the Vindigo server in the foreground
  vindigo init                 Configure your Vindigo installation
  vindigo update               Perform update scripts
  vindigo check-version        Query the latest version of Vindigo
  vindigo migrate:make <name>  Create a new migration
  vindigo migrate:apply        Apply all pending migration
  vindigo migrate:rollback     Rollback the previous migration
  vindigo migrate:status       Display migration information
  vindigo migrate:generate     Generate required code files

Options:
  --version  Show version number
  --json     Print out all messages in JSON form
  --help     Show help
Updating Vindigo
Updating Vindigo is simple using the built-in updater script. The process of applying updates differs slightly
depending on how you downloaded Vindigo.
Local Git repository
If you installed Vindigo by cloning the GitHub repository, the first step is to pull the latest changes.
git pull
Once you're on the latest version, proceed by running the updater script.
./vindigo update
Direct download
If you downloaded Vindigo directly, the steps to update vindigo are as follows.
- Download the latest version of Vindigo
- Copy the
datadirectory into the new Vindigo installation - Run
./vindigo updatein the new installation
You can now remove the old Vindigo installation directory, however it is recommended to always back-up the data directory in case of accidental loss.
Development setup
Before you can start contributing to Vindigo, make sure to follow the installation tutorial.
Run development setup
During development you might want to enable live compiling, to do so run the following commands in separate terminals.
yarn workspace vindigo-server watch  # Automatically compile & start the server
yarn workspace vindigo-client watch  # Launch a Webpack dev server
yarn workspace vindigo-cli watch     # Automatically compile the CLI
You can now access Vindigo on http://localhost:8080.
Any changes made to the code will result in your changes being compiled live. Keep in mind while the CLI is automatically compiled you will still need to execute it manually.
Developing with VSCode
When your editor of choice is Visual Studio Code, you will be able to find pre defined tasks you can use during development.
Simply navigate to Terminal > Run Task... and select which operation you want to execute.
Publishing contributions
TODO: Code of Conduct