ChatGPT Web Share


A web application that allows multiple users to share a ChatGPT account at the same time, developed using FastAPI and Vue3. It can be used for sharing or renting a ChatGPT account among friends. It supports ChatGPT Plus, setting conversation models, and user request limits.
3.15 Update: Now supports GPT-4! You can share a ChatGPT Plus account with your friends and use GPT-4 together.

This readme was translated by ChatGPT.
Features
- Uses the unofficial ChatGPT API, supports ChatGPT Plus accounts
- Supports GPT-4 ?
- Supports selecting which ChatGPT model to use (sha or paid or gpt-4, if is plus account)
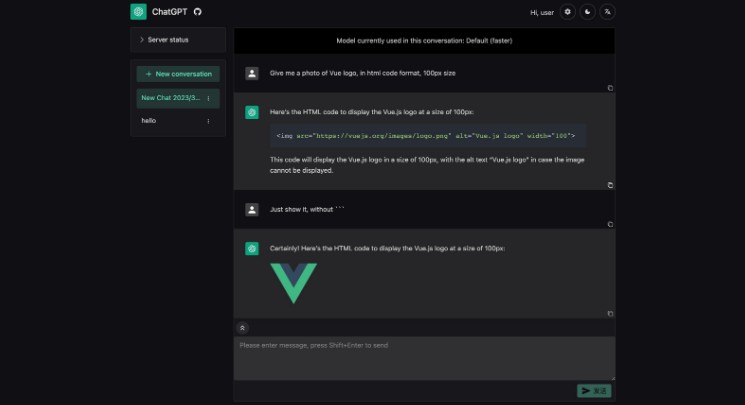
- A beautiful and concise web interface using naive-ui
- multiple languages
- dark mode
- copying reply content as Markdown format with one click
- showing images/tables/formulas/syntax highlighting in replies
- Export conversation to beautiful markdown and PDF files ? (new in v0.2.3)
- Creates multiple users to share a ChatGPT account
- Different users’ ChatGPT conversations are separated and do not affect each other
- When multiple users request at the same time, they will be queued for processing
- Administrators can set users’ maximum number of conversations and conversation time limits, etc.
Using Proxy
Risk Warning: This project is currently using revChatGPT V1, which uses its reverse proxy to bypass Cloudflare verification, therefore it is subject to request limits and does not guarantee long-term stability. And it has been recently reported that OpenAI may deactivate accounts that use this method. Please use it at your own risk.
However, if you have a ChatGPT Plus account, you can use a custom proxy to bypass the request limit. After deploying proxy server, set chatgpt_base_url to http://your-hostname/api/ in config.yaml.
Version 0.2.7 update: Reverse proxy service has now been integrated into the Docker image! If you are deploying with Docker, you can configure it in config.yaml as follows:
chatgpt_base_url: http://127.0.0.1:6062/api/
run_reverse_proxy: true
reverse_proxy_port: 6062
reverse_proxy_binary_path: ChatGPT-Proxy-V4
reverse_proxy_puid: "_puid value from cookie"
Note that reverse_proxy_puid needs to be obtained from your browser: Open https://chat.openai.com/, open the developer tools, find the _puid field in the cookies, and enter its value in config.yaml.
reverse_proxy_binary_path is the path to the executable file of the reverse proxy service. If using Docker, it is included in the image at the path /app/backend/ChatGPT-Proxy-V4.
chatgpt_base_url can also be set to the address of another reverse proxy service. If run_reverse_proxy is enabled, make sure the port of chatgpt_base_url matches reverse_proxy_port.
Deployment
Using docker
It is recommended to use docker-compose for deployment. Create a new docker-compose.yml file with the following contents:
version: "3"

services:
  chatgpt-share:
    image: ghcr.io/moeakwak/chatgpt-web-share:latest
    container_name: chatgpt-web-share
    restart: always
    network_mode: bridge
    ports:
      - 8080:80 # web port
    volumes:
      - ./data:/data # store database files
      - ./config.yaml:/app/backend/api/config/config.yaml   # backend config file
In the same folder, create config.yaml with the following contents:
Create a config.yaml file in the same directory with the following content:
print_sql: false
host: "127.0.0.1"
port: 8000
database_url: "sqlite+aiosqlite:////data/database.db"
run_migration: false

jwt_secret: "your jwt secret"    # Used for generating JWT token, like a password
jwt_lifetime_seconds: 86400
cookie_max_age: 86400            # Login expiration time
user_secret: "your user secret"  # Used for generating user password, like a password

sync_conversations_on_startup: true # Whether to synchronize ChatGPT conversations on startup, recommended to enable
create_initial_admin_user: true     # Whether to create initial admin user
create_initial_user: false          # Whether to create initial normal user
initial_admin_username: admin       # Initial admin username
initial_admin_password: password    # Initial admin password
initial_user_username: user         # Initial normal username
initial_user_password: password     # Initial normal password

chatgpt_access_token: "your access_token"    # Need to get from ChatGPT
chatgpt_paid: true  # Whether you are a ChatGPT Plus user
How to get chatgpt_access_token: After logging in to chat.openai.com, open https://chat.openai.com/api/auth/session and get the accessToken field.
Finally, run docker-compose up -d.
To upgrade, run docker-compose pull and docker-compose up -d.
Using Caddy
Frontend
You need to install nodejs and pnpm first, then run:
cd frontend
pnpm install
pnpm run build
Backend
You need to install poetry first and place config.yaml in the backend/api/config directory, then run:
cd backend
poetry install
poetry run python main.py
After installing Caddy, create a new Caddyfile and refer to the Caddyfile for its content.
Use caddy start to start Caddy.