Recipe how to build Grid and CRUD functionality over resource in Vue.js 2 application
Goal
This recipe shows the plan with which you can build the following functionality:
-
Suppose that at backend you have some resource available to be seen and managed via Rest Api
-
Lets call this resource a model which is the common way with backend to call objects representing rows in the tables
-
Now we need a functionality to see the list of these models and CRUD for them
-
Following this recipe you will have a quick start to run the next functionality of managing models:
- Model’s list page with the next functionality:
- the page shows only the models who fits conditions of filtering, sorting and requested pagination page
- from the server we load only those model we need for current pagination page ❗ , we do not load all resources from API before work
- when conditions to show models on current page changes we make a new request to API for resources needed
- sorting row allows to sort table according to column you choose
- filtering row allows to set the condition for models to be seen with function of validation of these filter values
- informational tip about amount of shown and found models
- pagination to move to the page you need (data is cached, if you loaded page already, it will be taken from cache)
- Technically module state to serve for our module is kept in the separate VUEX module
CRUDmakes model managing form to be shown and we can delete model- Everything is easy to be changed for new requirements
- Model’s list page with the next functionality:
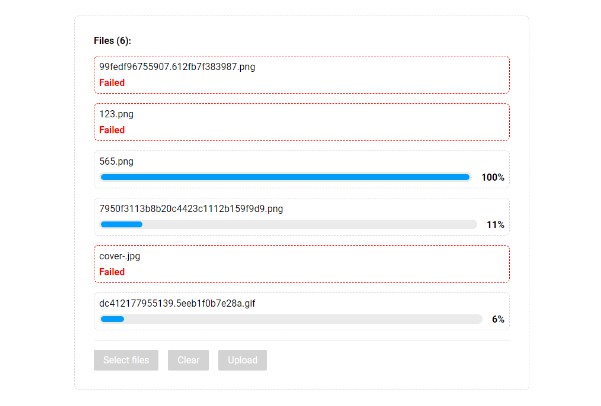
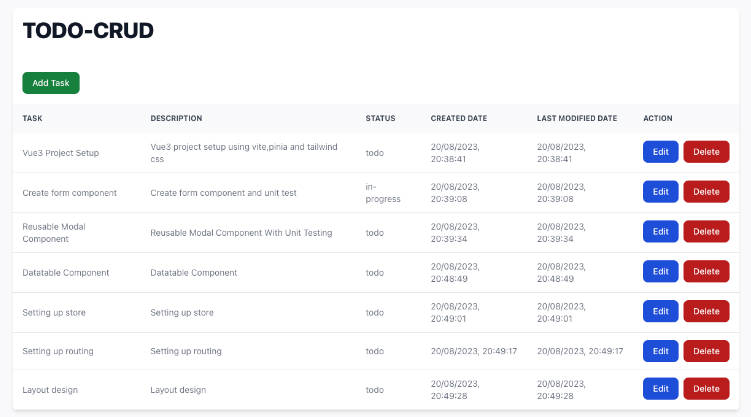
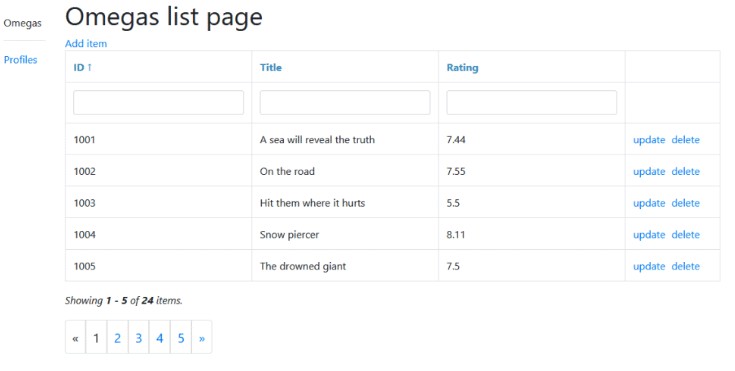
Demo
The functionality by default will look like this:

Installing demo
Clone the repository
git clone [email protected]:mgrechanik/vue.js-2-recipe-of-grid-and-crud-functionality-for-resources.git
Run
npm install
Launch the RestAPI with database for our application
json-server --watch ./db/crud_db.json
It will give us two resources with the next addresses:
  Resources
  http://localhost:3000/omegas
  http://localhost:3000/profiles
If your addresses are different then set them in the
_moduleSettings.jsof every module, details later.
Run the application
npm run serve
Now you will see pages with grid and crud functionality for tho models – omega and profile
Explanation of structure
The details of the structure of this recipe you can see in the demo example.
The main concepts are:
- The functionality about vuex part of the module resides in
src/store/moduleName.js.
The functionality of the module components resides in src/components/crud/moduleName/.
- We have omega module who is the base module from who we inherit our functionality.
You need to have this module, copy it to your project. Based on it we will create our own modules.
- profile module is the example of building your own module by inhereting from omega module.
The list of steps needed to create your own module
Lets call both our new model and module a zeta
-
copy
components/crud/profiletocomponents/crud/zeta -
vuex part of the module (directory src/store)
profile.jscopy tozeta.js- At
zeta.js- change filter and sorting columns (ones we need)
- At
- add to
store/index.js
import zeta from './zeta' import * as ZETA_SETTINGS from '@/components/crud/zeta/_moduleSettings'; zeta.state.settings = ZETA_SETTINGS; modules: { omega, profile, zeta } ``` -
changes in the directory
components/crud/zeta
-
_moduleSettings.js- settings for this model (details in the file itself)
-
EditForm.vue
  - your columns
    - template
	-
	data: function() {
			return {
				model: {
FilterRow.vue
    - template

	-
	data: function() {
		return {
			filter: {
-
GridView.vue- template
-
TitleAndSortRow.vue
   - template
   -
	data: function() {
		return {
			sort: {
- You need to add the initialization
- at App.vue
this.$store.dispatch("zeta/initializeAction", this.$store); this.$store.dispatch("zeta/setPageAction", 1);- or in the router’s view
- Add these components to the pages needed, see the router part in the example.
Extending possibilities
With the profile module you can see that creating it by inhereting of base module – omega – we were soling next main tasks:
- changing module settings at
_moduleSettings - setting your columns
- changing component’s templates
We did not need to change component’s logic, though there are no problems with it, components are extenging one another according Vue rules, and logic could be overridden. Also you can use your own components.