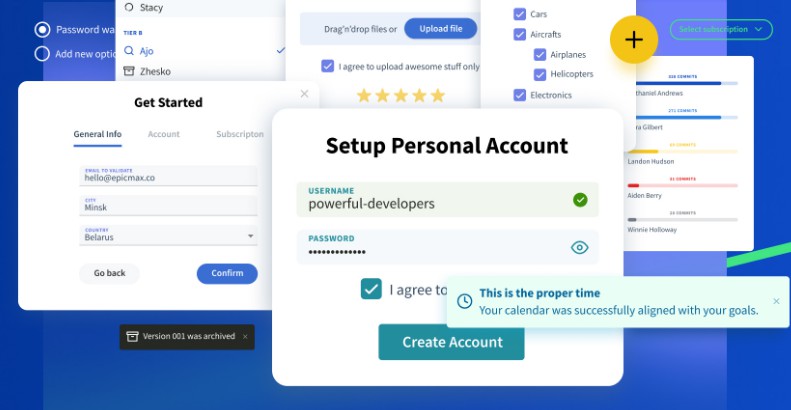
Framevuerk
Fast, Responsive, Multi Language, Both Direction Support and Configurable UI Framework based on Vue.js.
Setup
First at all, you should install Framevuerk and of course Vue from terminal.
npm install vue --save
npm install framevuerk --save
You can also install these, just if you want active touch actions support, fvDatepicker jalaali dates supoort and icons.
npm install idate --save
npm install hammerjs --save
npm install font-awesome --save
And just follow the example and use it! (commonjs syntax and require also available)
// Vue package
import Vue from 'vue'

// Framevuerk main js file
import Framevuerk from 'framevuerk/dist/framevuerk.js'

// If you handle styles with webpack, import this. Else you can include this via <link rel="stylesheet">
import 'framevuerk/dist/framevuerk.css'

// IDate package, just if you want globally support jalaali dates for fvDatepicker
import IDate from 'idate'
Framevuerk.use('date', IDate)

// Hammer package, just if you want active touch actions support
import Hammer from 'hammerjs'
Framevuerk.use('hammer', Hammer)

// Font-Awesome icons, just if you want active icons
// If you handle styles with webpack, import this. Else you can include this via <link rel="stylesheet">
import 'font-awesome/css/font-awesome.css'

// Active Framevuerk...
Vue.use(Framevuerk)

// And finally, Initializing app
const app = new Vue({
  el: "#app"
});"
Finally you need to create your template just like this.
<html>
  <head>
    <link rel="stylesheet" href="path/to/your/app.css"/>
  </head>
  <body>
    <fv-main id="app">
      <!-- Your Content -->
    </fv-main>
    <script src="path/to/your/app.js"></script>
  </body>
</html>
Customize
Framevuerk can have different language, direction, and colors based on the user's taste. To setup your custom version, create a file called .framevuerkrc.js in root of your project and put these on:
module.export = {
  // config name
  'config-name': 'foobar',

  // your locale and direction.
  locale: 'en', // or 'fa'
  direction: 'ltr', // or 'rtl'

  // theme colors:
  'primary-color': '#41b883',
  'secondary-color': '#35485d',
  'danger-color': '#dd4b39',
  'warning-color': '#ef8f00',
  'info-color': '#14b0cf',
  'bg-color': '#f9f9f9',

  // base padding size
  padding: '15px',

  // base animation speed
  'transition-speed': '0.35s',

  // base border radius applied to buttons, inputs and etc.
  'border-radius': '4px',

  // base shadow size applied to header, footer, form elements and etc.
  'shadow-size': '3px'
}
And output files goes to ./node_modules/framevuerk/dist directory:
- framevuerk-foobar.js
- framevuerk-foobar.css
- framevuerk-foobar.min.js
- framevuerk-foobar.min.css
You can also use .framevuerkrc.json, .framevuerkrc or framevuerk key inside your package.json to pass this variables to Framevuerk!
Framevuerk apply these config by this cli command:
./node_modules/.bin/framevuerk
# or on npm scripts, just:
framevuerk